Instructions for Switching Tenants from a Single Account
For users:
- In the upper left corner of the portal, to the right of the brand, find the select interface element (dropdown list).

-
Click on the select, then choose the desired tenant from the provided list.
If the required tenant is not available in the provided list, please contact your HR specialist or administrator for additional configuration of your profile, then try to switch to the desired tenant using the instructions above.
After these actions, the user will be redirected to the page of the selected tenant.
For HR specialists and administrators:
In order for the user to be able to select the desired tenant, it is necessary to add the appropriate settings in the user profile. To do this:
- Go to the user profile.
- Navigate to the User Management section and find the Roles section.
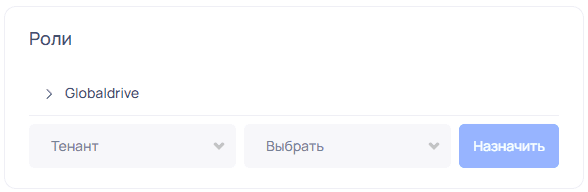
- In the Tenant selection field, choose the desired tenant from the provided list, in the adjacent field select the user's role for the chosen tenant, then click Assign.
Upon successful assignment, a new entry with the name of the added tenant will appear in the user's roles list, and a system message “Role successfully assigned” will be displayed in the corporate portal workspace. Add the required number of tenants by repeating step 3.
Actions with entries in the Roles section:
- Any entry in the list can be expanded to view the user's role for the corresponding tenant.
- To delete a role, expand the entry and click on the “trash can”.